
Last week in this space, The Web Guys explained why authenticating your company’s Facebook page is important. Today, we’ll walk you through the process of getting your page verified so consumers can easily find it on the popular social network.
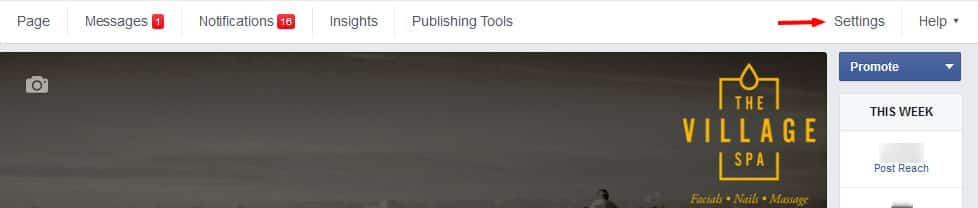
The first step is to access the settings on your business Facebook page.
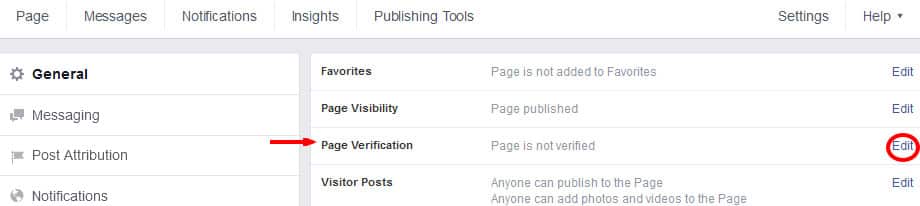
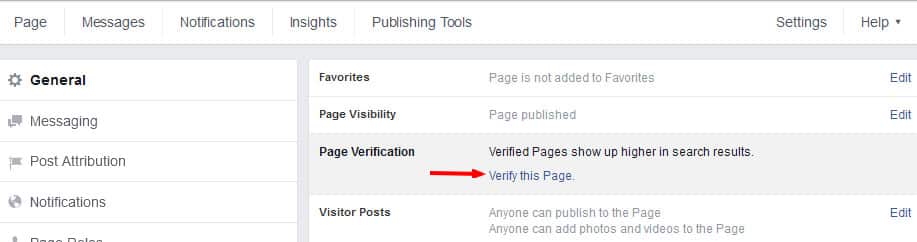
If you are an authorized administrator of the page, you’ll find the verification status near the top of the Settings. Click on the blue “Edit” link and then on “Verify this Page” to get started.
Choose Your Path
At this point, you’ll need to determine whether you want Facebook to use the business’ publicly listed phone number or business documents to confirm that your page is the real deal. (Pro tip: If your phone system requires a caller to enter an extension number to reach an employee, opt for the documentation method. Although you can include an extension on Facebook’s verification-request form, we have had mixed success with that option.)
If You Verify by Phone
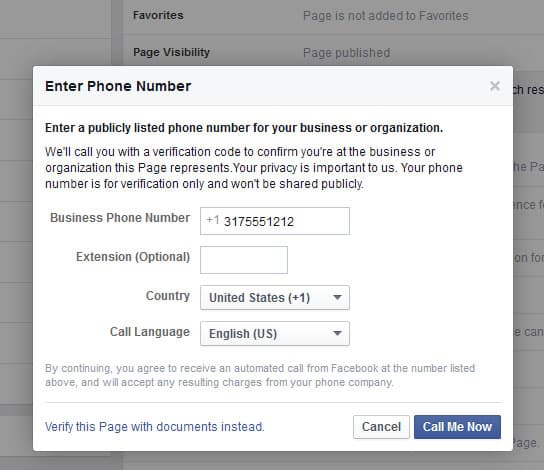
Phone verification is the quickest — and simplest — option. Enter the 10-digit phone number associated with your business, and then click the “Call Me Now” button. A new popup window will appear, asking you to enter a verification code. Almost simultaneously, you should receive an automated call from Facebook with a 4-digit code for you to use. Type that in and click “Continue.”
If the phone number you provided matches what Facebook can find in public listings, your company page should be displaying the gray verification badge in no time.

If You’d Rather Confirm Using Documents
Don’t be confused by the “Enter Phone Number” screen that appears at the beginning of the verification process. You can safely ignore everything there except the blue “Verify this Page with documents instead” link in the bottom left corner. Click that, and a new “Send Documentation” popup will appear with a list of acceptable materials, such as a utility bill or business tax file.
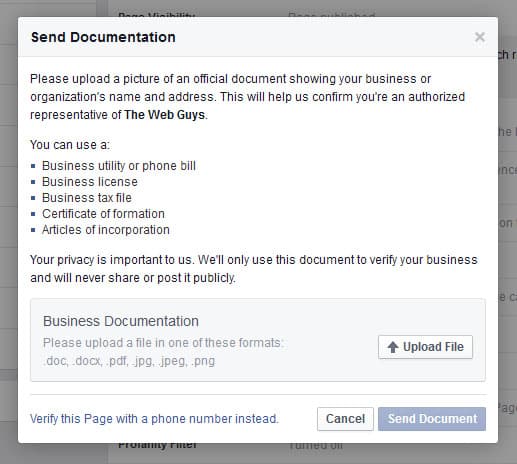
Locate the necessary paperwork — making sure that it includes both the business name and address as they appear on Facebook — and upload it by tapping the appropriate buttons. Facebook will review the information you send, compare it to what the social giant can find in public records, and notify you of its decision within a few weeks.
It’s also worth mentioning that at any point in the process, you can reverse course and choose the other verification method.
Why Verify Business Pages?
Facebook has said that verified pages are displayed higher in search results, an undeniable benefit as more consumers research companies online before making a buying decision. The check mark also helps to ensure that Facebook and its users know the difference between an official business page and any imitators.
Although the verification process is relatively simple, The Web Guys is happy to handle it as part of the digital marketing services we provide to clients across the country. Interested in some expert assistance? Contact us at (317) 805-4933 to learn more about how we can help you succeed online.